
Disclaimer: Please use the commands and examples provided here at your own risk. Ensure you have properly backed up your system and test the commands and utilities on non-production systems first.
Firmware security has been and continues to be, a passion of mine. This is just one reason I am excited to be working here at Eclypsium. Joining a firmware security company really got me thinking even more about the security of my own devices, specifically what lies at the firmware layer on my own desktop and laptop? I run Ubuntu Linux on my primary systems (I too am still waiting for the “year of the Linux desktop”, perhaps a topic for another time). Being a security professional, I take special interest in ensuring my devices are as secure as possible while maintaining an acceptable level of usability. However, I was astonished to discover that at the firmware level I had some work to do. In discovering and researching the impacts and remediation of the firmware vulnerabilities I uncovered, I realized how easy it is for vulnerabilities to hide and how difficult (especially on Linux systems) it was to enumerate and fix them. While I use Eclypsium products in this post, I will also show several examples of open-source tools so you can follow along at home for most of the examples in this article.
Secure Boot
One of the first findings brought to my attention was that Secure Boot was not enabled. After shaming myself, I remembered that in the past, installation instructions for most Linux distributions recommended disabling Secure Boot prior to installation. Not wanting to complicate installations any further I went into the BIOS/UEFI settings and disabled Secure Boot, then installed my Linux distribution of choice (sometimes that was POP_OS! And more recently Ubuntu). Once the installation was completed, I had not gone back and researched how to achieve better security using Secure Boot.
This brought forth one of my first questions: Why did most Linux distributions state that Secure Boot should be disabled? It turns out Linux distributions had not completed the process to get all of the required binaries signed that allow a computer to boot securely. With there being so many Linux distributions this proved to be quite the challenge. It was only in the past 2-3 years that many distributions have moved to enable Secure Boot by default. Understanding what needs to be done in order to support Secure Boot leads us pretty deep down a rabbit hole, which begins with first understanding how Secure Boot works.
A good starting point is to read some of the previous research on vulnerabilities related to Secure Boot. Eclypsium researchers have presented on Secure Boot dating as far back as 2013 at Black Hat USA in a talk titled “A Tale of One Software Bypass of Windows 8 Secure Boot” and again in 2014 at Defcon “Summary of Attacks Against BIOS and Secure Boot“.
In July 2020 Eclypsium researchers published vulnerabilities dubbed “Boothole”, and provided a great description of how Secure Boots works at a high level:
“There are other implementations of secure boot designed for different environments, but UEFI Secure Boot is the standard for PCs and servers. The goal is to prevent malicious code from being introduced into the boot process by cryptographically checking each piece of firmware and software before it is run. Any code not recognized as valid is not executed in the boot process.
Secure Boot uses cryptographic signatures to verify the integrity of each piece of code as it is needed during the boot process. There are two critical databases involved in this process: the Allow DB (db) of approved components and the Disallow DB (dbx) of vulnerable or malicious components, including firmware, drivers, and bootloaders. Access to modify these databases is protected by a Key Exchange Key (KEK), which in turn is verified by a Platform Key (PK). Although the PK is used as a root of trust for updates to the platform, it’s not expressly part of the boot process (but is shown below for reference). It is dbx, db, and KEK that are used to verify the signatures for loaded executables at boot time.”
https://eclypsium.com/research/theres-a-hole-in-the-boot/
Note: It is a good idea to read the entire post referenced above to gain further understanding of Secure Boot and its components (This was also a helpful primer: “The Meaning of all the UEFI Keys“). With respect to Boothole, during this exercise, I also wanted to verify that my system, and specifically GRUB, was not vulnerable to Boothole. Fortunately, the Eclypsium research team has made available scripts for both Windows and Linux to do just that. You can find them at https://github.com/eclypsium/BootHole. Below are the results from my system:
$ sudo bash BootHoleDetection.sh
Boot Hole Detection Bash Script
Copyright (C) 2020, Eclypsium, Inc.
This program comes with ABSOLUTELY NO WARRANTY.
This is free software, and you are welcome to redistribute it under certain conditions;

[*] mokutil:
SecureBoot disabled

[!] ESP is not protected


[+] No indication found that GRUB/Shim is vulnerable to BootHole
In order to maintain a chain of trust to support secure Secure Boot binaries involved in the boot process must be signed. Currently, Microsoft provides a service that validates and signs binaries via Microsoft’s 3rd Party UEFI CA. This means, typically, that the OEM of your hardware and Microsoft are both able to update the list of allowed (DB) or disallowed binaries and certificates involved in the Secure Boot process. Yes, there are still some in the Linux open-source community not-so-happy that the signing process is controlled by Microsoft. Before Linux distributions added the ability to create signed software in the boot process, using Secure Boot and Linux meant you had to generate your own keys, use them to sign the DB and the DBX, then install them by hand into your computer’s BIOS/UEFI. While that may sound a bit scary, it is certainly possible. However, creating your own keys introduces extra maintenance steps. For example, if you’ve generated your own keys and then update your kernel, you must sign your new kernel (or even kernel module) with your keys since Secure Boot validation extends to the kernel.
There are alternative approaches that use full-disk encryption, including the partition that contains the kernel, to get around having to re-sign your kernel after each update (For the full details see “Take Control of Your PC with UEFI Secure Boot”). There is also a mechanism to allow the user to sign software with a MOK (Machine Owner Key), essentially allowing the user to make exceptions to the Secure Boot chain of trust on a case-by-case basis. This can become tedious if you are, for example, loading new kernel modules on a regular basis. Another issue with the “roll your own keys” approach is that software and utilities that check to make sure you have the latest revocation list or allow you to update the revocation list would need access to your keys (specifically your KEK) in order to provide this verification. This puts more responsibility on the user and/or systems administrators to keep keys safe, up-to-date, and verify the integrity of the DB and DBX variables.
You can rely on your operating system vendor, even when using Linux, to provide the necessary components to enable Security Boot. Developers from various Linux distributions have developed a small first-stage bootloader called “Shim”. Shim is pre-bootloader software developed by the open-source community. The intention is to provide a small, well-understood, piece of software that can become a root of trust for Linux distributions to securely load other programs (such as GRUB) during the boot process. Shim is signed by Microsoft’s 3rd Party CA and also includes Linux distribution-specific keys to validate the rest of the boot process. This allows, for example, Ubuntu users like myself (tested on 20.04 LTS) to enable Secure Boot. However, one of the issues I had to tackle was updating the DBX. As you will see below the DBX, the revocation list for Secure Boot was flagged as being out-of-date. Keeping an updated DBX allows the system to reject binaries in the Secure Boot process that have been identified as insecure. For example, the discovery of BootHole meant that virtually every signed version of GRUB2 was vulnerable and could allow an adversary to gain code execution during the boot process even when Secure Boot is enabled. Updating the DBX is critical to ensuring that such vulnerable bootloaders are not allowed.
Getting to the DBX
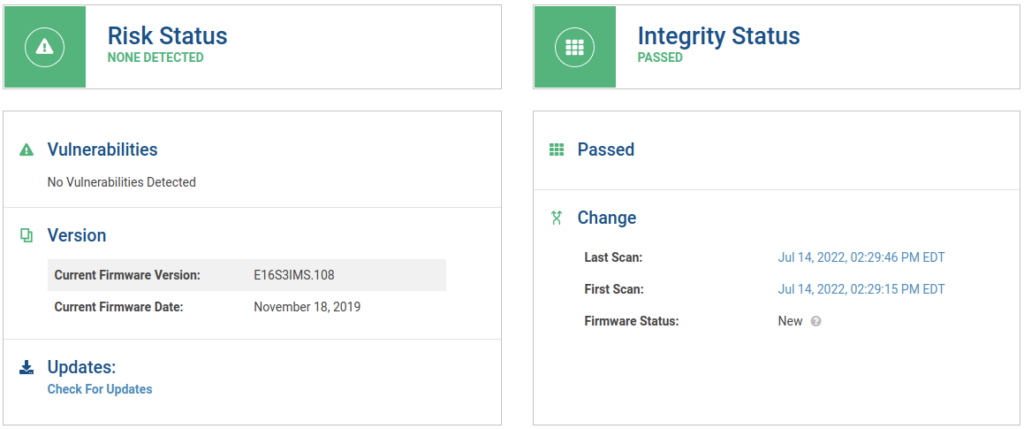
First, let’s have a look at one of my system’s device details:

My first thought in tackling my firmware security issues was to update the BIOS/UEFI. Given the details above, we know that this may not update the KEK, DB, or DBX. I understand it is easy for users to assume that a BIOS/UEFI update will accomplish this task given the keys and databases are stored at the firmware level, but this is not always the case.
For some of the upcoming tasks on my list for this particular machine an updated BIOS/UEFI is required. I verified the above information using Linux command-line utilities as well:
$ sudo dmidecode -s bios-version
E16S3IMS.108

$ sudo dmidecode -s bios-release-date
11/18/2019
A quick check on the manufacturer’s website reveals that it is, in fact, the latest version available. I am disappointed at this stage in the game as I would like MSI (and other manufacturers) to more frequently provide updated BIOS/UEFI firmware updates.
Next, I began looking at some of the other potential security issues discovered on this device, including Secure Boot being disabled as noted by the report:
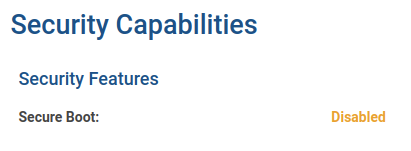
Again, I verified this using readily available Linux utilities as follows:
$ mokutil --sb-state
SecureBoot disabled
Note: If mokutil is not installed on your system you can install it from the package repository: “sudo apt install mokutil”.
Next, I came across the finding that uncovered an outdated DBX was present on my system:
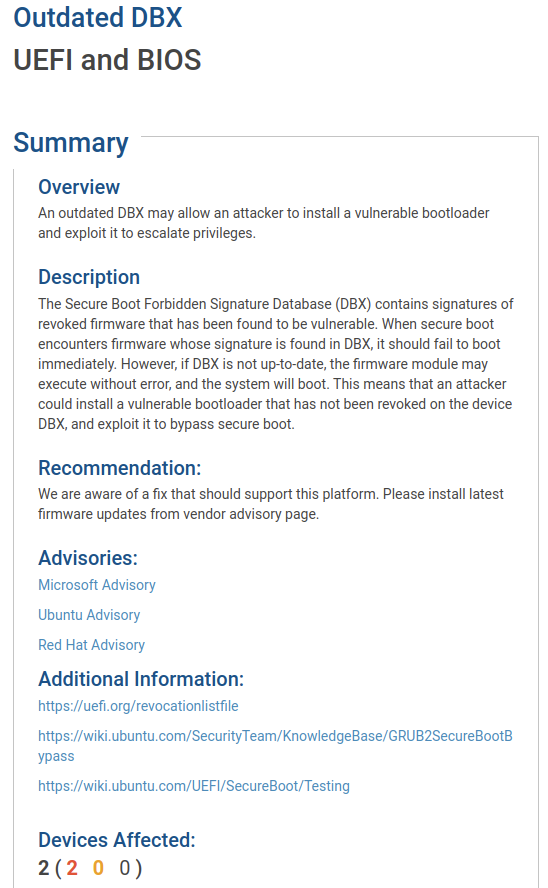
Well, certainly I am now on a mission to get Secure Boot enabled and make sure I have an updated DBX! One potential way to check for this, and other firmware updates in Linux, is to use LVFS (the Linux Vendor Firmware Service). LVFS is a free portal where vendors can upload new firmware updates that can then be applied to devices on Linux systems. You can install “fwupd” and use the include utilities to view the devices within your system as follows:
Above you can see the modified output showing that there is a UEFI DBX on my system and the device is “updatable”. Not wanting to cause any issues on my system I used another fwupdmgr command to just check for available firmware updates for the discovered devices:
# fwupdmgr get-updates
Devices with no available firmware updates:
 • System Firmware
 • Thunderbolt host controller
 • UEFI dbx
 • WDC PC SN730 SDBPNTY-1T00-1032
No updatable devices
According to LVFS it seems there are no updatable devices. Before you go blaming LVFS, remember the vendor has to upload new updates to LVFS. In my case, the vendors have not (yet) provided firmware updates to LVFS, so as far as LVFS is concerned there are no actions to be performed. However, independent of the hardware and software vendors UEFI itself makes available updated revocation lists for the DBX. Certainly, we should be able to update the DBX to the latest version! I started by installing some utilities:
$ sudo apt install efitools
Efitools comes with a utility called efi-readvar that will read the DBX (or any other EFI variable) and output the contents to a file:
$ efi-readvar -v dbx -o existing_dbx.esl
Variable dbx, length 3724
To read the contents of the file you can use a utility called dbxtool. When looking at various DBX variable dumps the version of dbxtool included in my distribution was having some issues reading certain files, so I compiled the latest version from source:
$ sudo apt install libefivar-dev libpopt-dev
$ git clone https://github.com/rhboot/dbxtool/
$ cd dbxtool
$ make
Take note of where the latest version of dbxtool was compiled, for demonstration purposes I placed it in my home directory. Next, we’ll use our freshly compiled version of dbxtool to read the file containing our existing DBX:
$ ~/dbxtool/src/dbxtool -d existing_dbx.esl -l | tail -1
240: {microsoft} {sha256} 540801dd345dc1c33ef431b35bf4c0e68bd319b577b9abe1a9cff1cbc39f548f
You can parse and read the data as you wish and review all of the entries or select entries. The above example shows only the last entry in the file indicating that we have 240 total entries . Next, we’ll retrieve the latest DBX from the UEFI website:
$ wget https://uefi.org/sites/default/files/resources/dbxupdate_x64.binThe UEFI DBX update above is signed by Microsoft’s 3rd Party CA, and therefore will work with the keys that exist on the system already. While searching for a method to apply this update I discovered a package in Ubuntu called “secureboot-db”. I took a look at the Systemd file for this package (Located here if you are interested: /usr/lib/systemd/system/secureboot-db.service) and replicated the commands and procedure for updating the DBX. First, I had to copy the new DBX to a specific location:
$ sudo cp dbxupdate_x64.bin /usr/share/secureboot/updates/dbx/dbxupdate_x64.binNext, fingers crossed, execute the command to update the existing DBX on my system:
$ sudo /usr/bin/sbkeysync --no-default-keystores --keystore /usr/share/secureboot/updates --verboseThe output was very verbose and printed out to the terminal the entire contents of both DBXs, ending with confirmation the DBX had been updated successfully:
Filesystem keystore:
  /usr/share/secureboot/updates/dbx/dbxupdate_x64.bin [13501 bytes]
firmware keys:
  PK:
    /CN=MSI NB - 2013 PK
  KEK:
    /C=US/ST=Washington/L=Redmond/O=Microsoft Corporation/CN=Microsoft Corporation KEK CA 2011
  db:
    /C=US/ST=Washington/L=Redmond/O=Microsoft Corporation/CN=Microsoft Windows Production PCA 2011
    /C=US/ST=Washington/L=Redmond/O=Microsoft Corporation/CN=Microsoft Corporation UEFI CA 2011
  dbx:
    540801dd345dc1c33ef431b35bf4c0e68bd319b577b9abe1a9cff1cbc39f548f
    408b8b3df5abb043521a493525023175ab1261b1de21064d6bf247ce142153b9
    37a480374daf6202ce790c318a2bb8aa3797311261160a8e30558b7dea78c7a6

    /CN=Debian Secure Boot Signer
    /C=GB/ST=Isle of Man/O=Canonical Ltd./OU=Secure Boot/CN=Canonical Ltd. Secure Boot Signing
    45c7c8ae750acfbb48fc37527d6412dd644daed8913ccd8a24c94d856967df8e
    64575bd912789a2e14ad56f6341f52af6bf80cf94400785975e9f04e2d64d745
    939aeef4f5fa51e23340c3f2e49048ce8872526afdf752c3a7f3a3f2bc9f6049

filesystem keys:
  PK:
  KEK:
  db:
  dbx:
    af79b14064601bc0987d4747af1e914a228c05d622ceda03b7a4f67014fee767
     from /usr/share/secureboot/updates/dbx/dbxupdate_x64.bin
    48f4584de1c5ec650c25e6c623635ce101bd82617fc400d4150f0aee2355b4ca
     from /usr/share/secureboot/updates/dbx/dbxupdate_x64.bin
    e060da09561ae00dcfb1769d6e8e846868a1e99a54b14aa5d0689f2840cec6df
     from /usr/share/secureboot/updates/dbx/dbxupdate_x64.bin

New keys in filesystem:
 /usr/share/secureboot/updates/dbx/dbxupdate_x64.bin
Inserting key update /usr/share/secureboot/updates/dbx/dbxupdate_x64.bin into dbx
Next, I rebooted my system and read the new DBX into a file:
$ efi-readvar -v dbx -o updated_dbx.eslNext, let’s take a look at the new DBX:
$ ~/src/dbxtool/src/dbxtool -d updated_dbx.esl -l | tail -1
271: {microsoft} {sha256} af79b14064601bc0987d4747af1e914a228c05d622ceda03b7a4f67014fee767
We certainly have more entries than before and it appears to have worked! I believe this process will also merge the existing DBX with the new DBX being applied, however, this may vary between Linux distributions and other DBX update methods. Once updated I verified in the Eclypsium product there were no longer findings related to the DBX state:
The above findings are in the “UEFI and BIOS” section within the product. You may also dig a bit deeper and review the “System Firmware Configuration” and in the details section search for DBX to show the entry that lists “OK”:
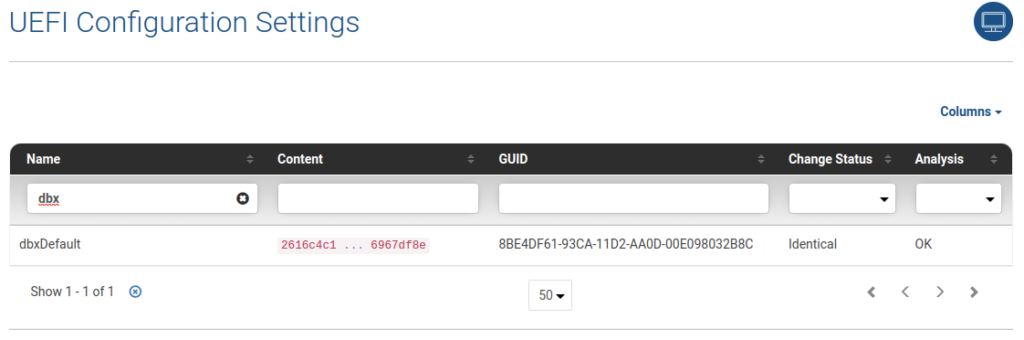
Eclypsium researchers help maintain capabilities in the product to detect conditions, such as an outdated DBX, a feature that is not included in many open-source tools.
Note: For Windows users you can replicate, at your own risk, the process outlined above by following this article from Microsoft: “Microsoft guidance for applying Secure Boot DBX update (KB4575994)“
Conclusion
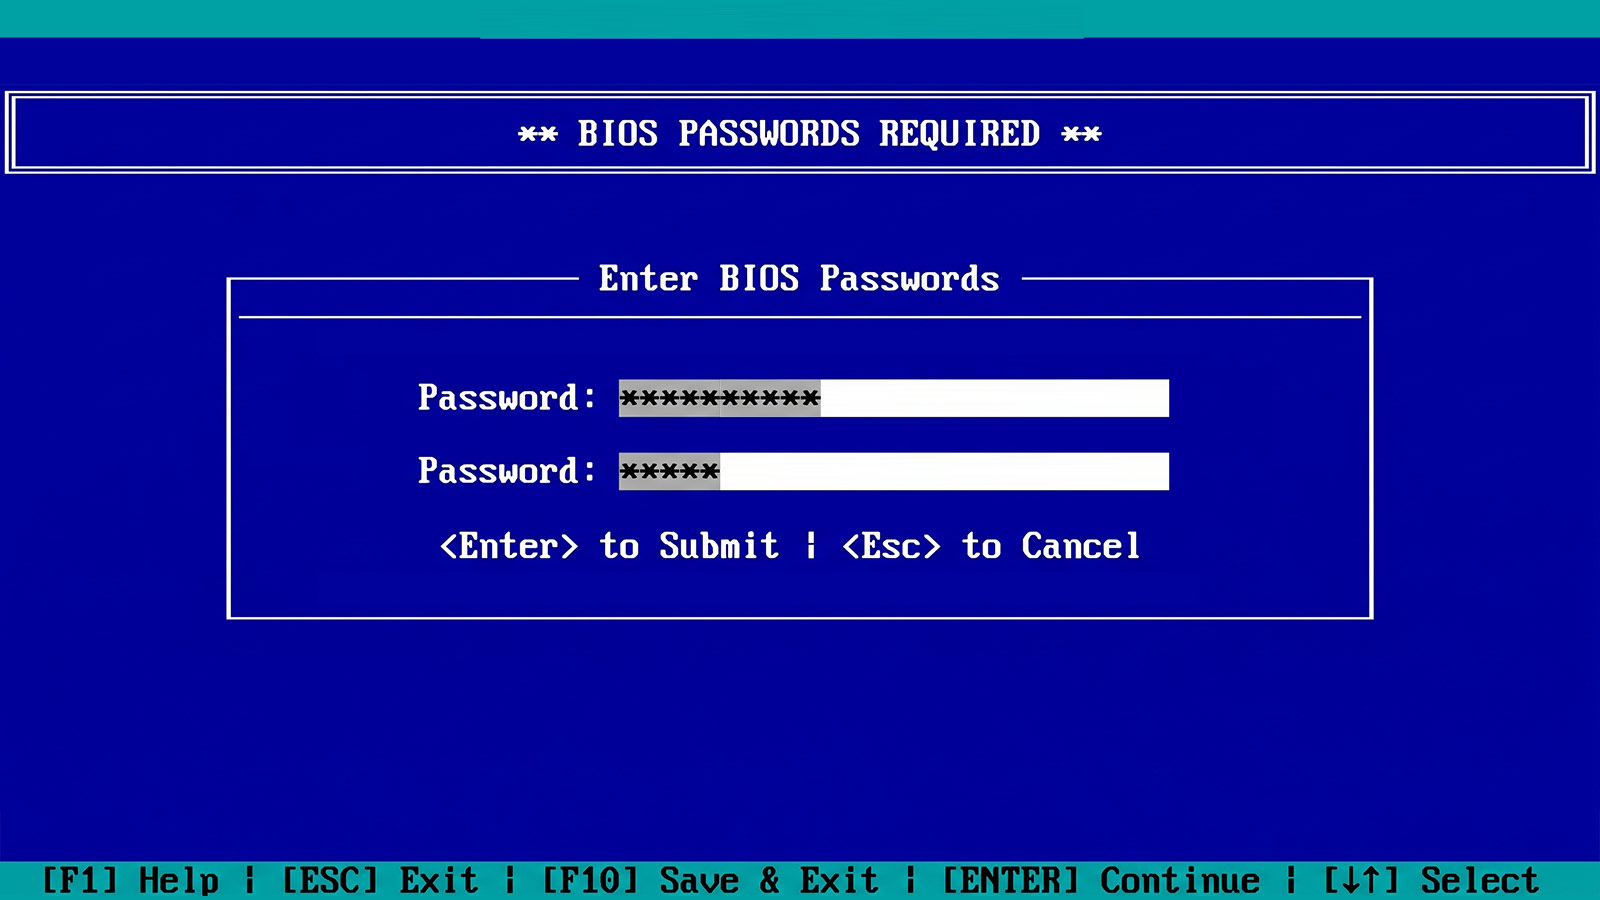
As I navigate through the landscape of firmware and firmware security, I’ve realized there are many different paths. Firmware updates, and updates to the different UEFI components, can come from many different sources. Updating these components may also require different procedures depending on the hardware, software, and vendors involved. The next article in this series will explore more examples of firmware identification and update processes. As for Secure Boot, be certain to enable it and set a UEFI/BIOS password to protect your systems. Most systems are likely not up-to-date if you solely rely on operating system updates (Microsoft’s Surface line being one exception) so be certain to look for firmware updates using the methods described in this post.
Special thanks to the Eclypsium research team, including Mickey Shkatov, Jesse Michael and Federico Perez, for assisting me with this article.